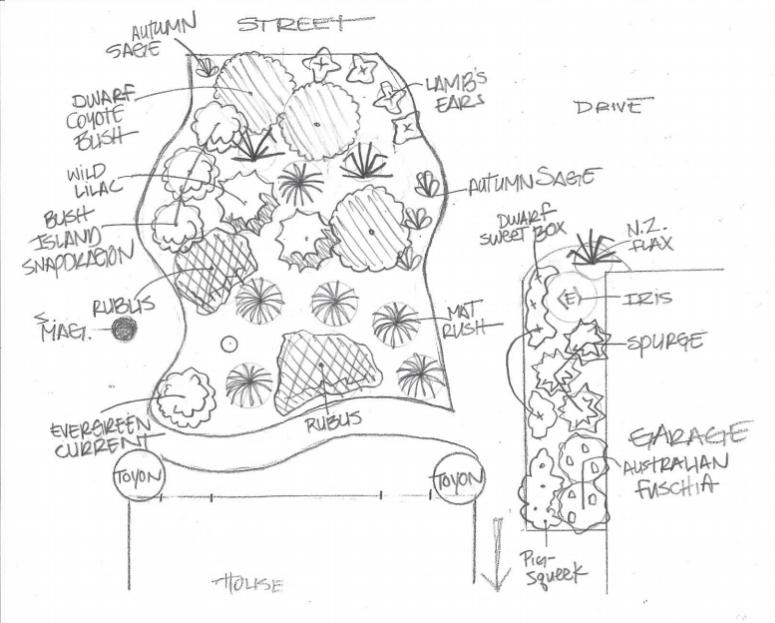
When we finish a yard, we create an informal sketch labeling all the plants for the client. If you applied for a rebate with the water district, we provide you the proper information about the plants in your yard to receive the rebate.
This is an example of a plan our clients receive
We apply a preparation of compost tea, which feeds beneficial soil organisms and helps the plants get settled in their new homes.
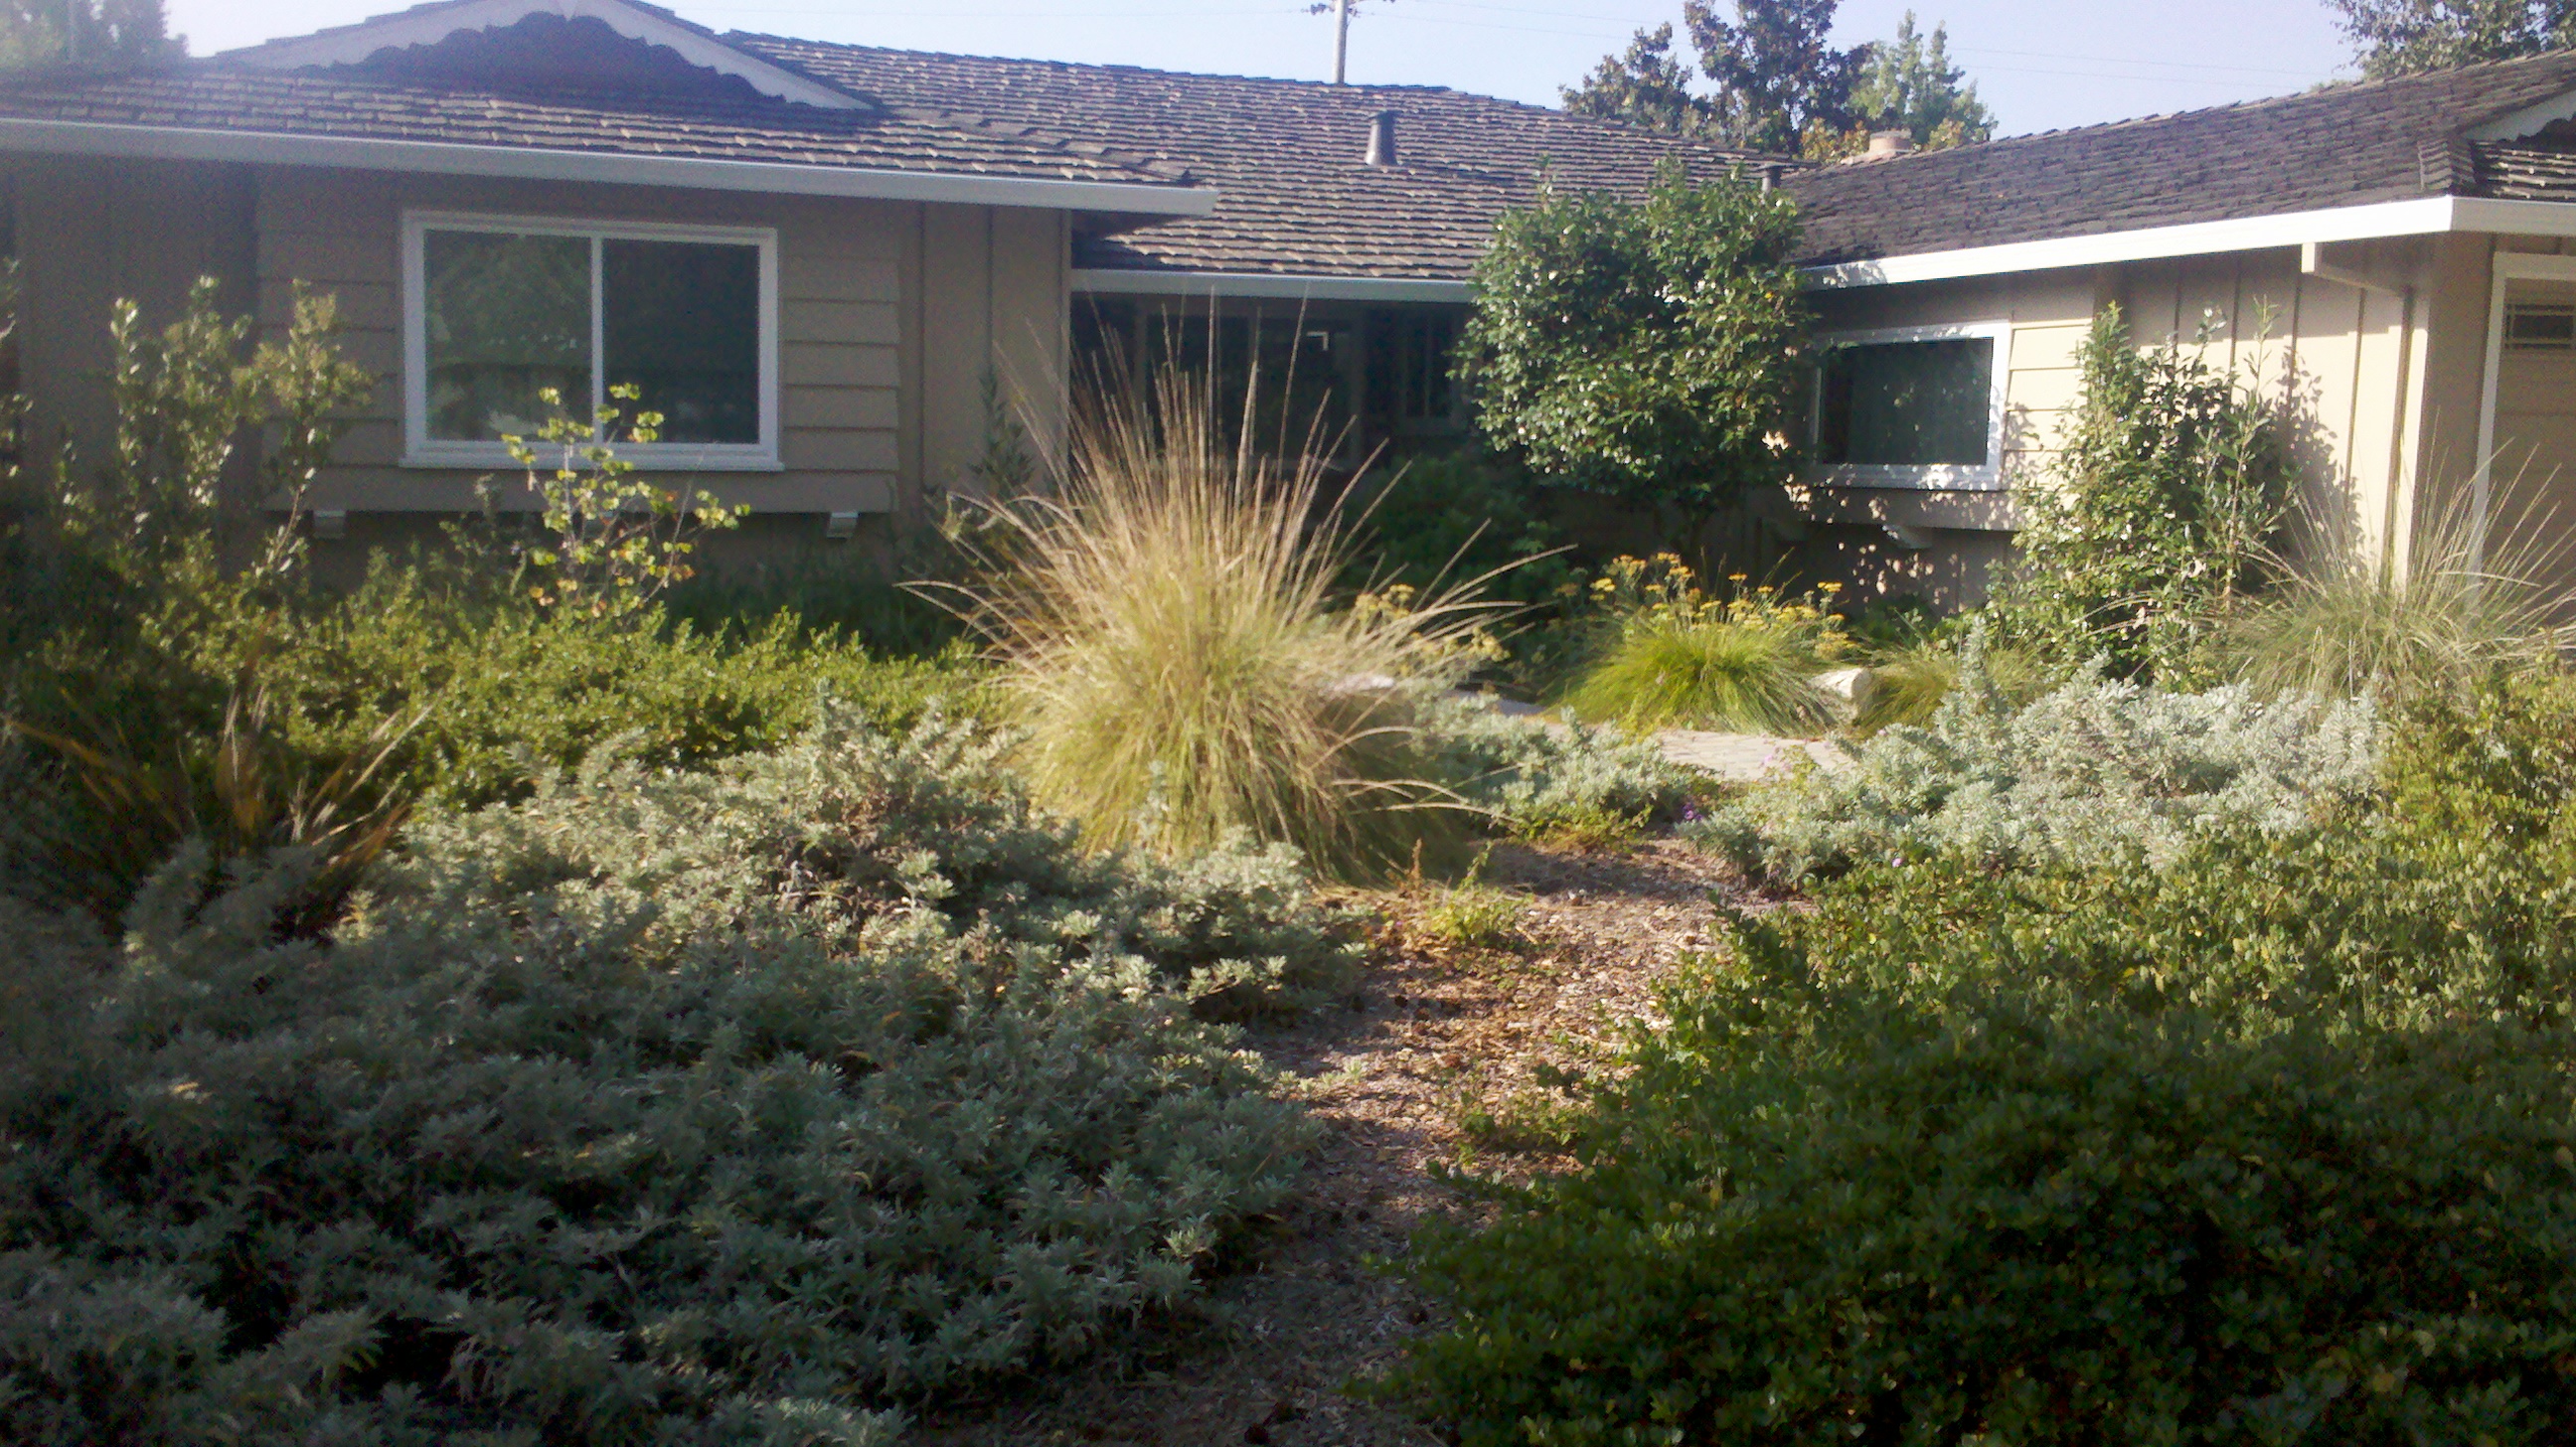
Once everything is all set up, it is time to relax, sit back, and watch the plants as they start to fill in!
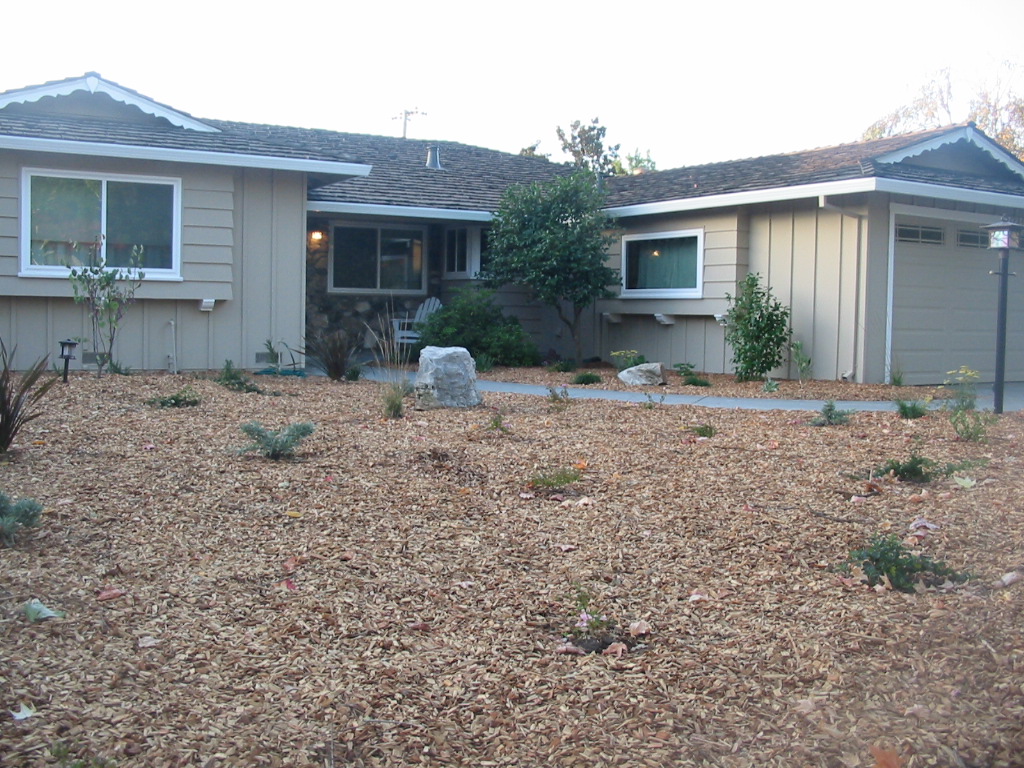
When the plants are first planted, they look very small and spread out because we use young plants to minimize customer costs.
Here is a house when we first planted it
However, they will fill in when they reach their adult size.
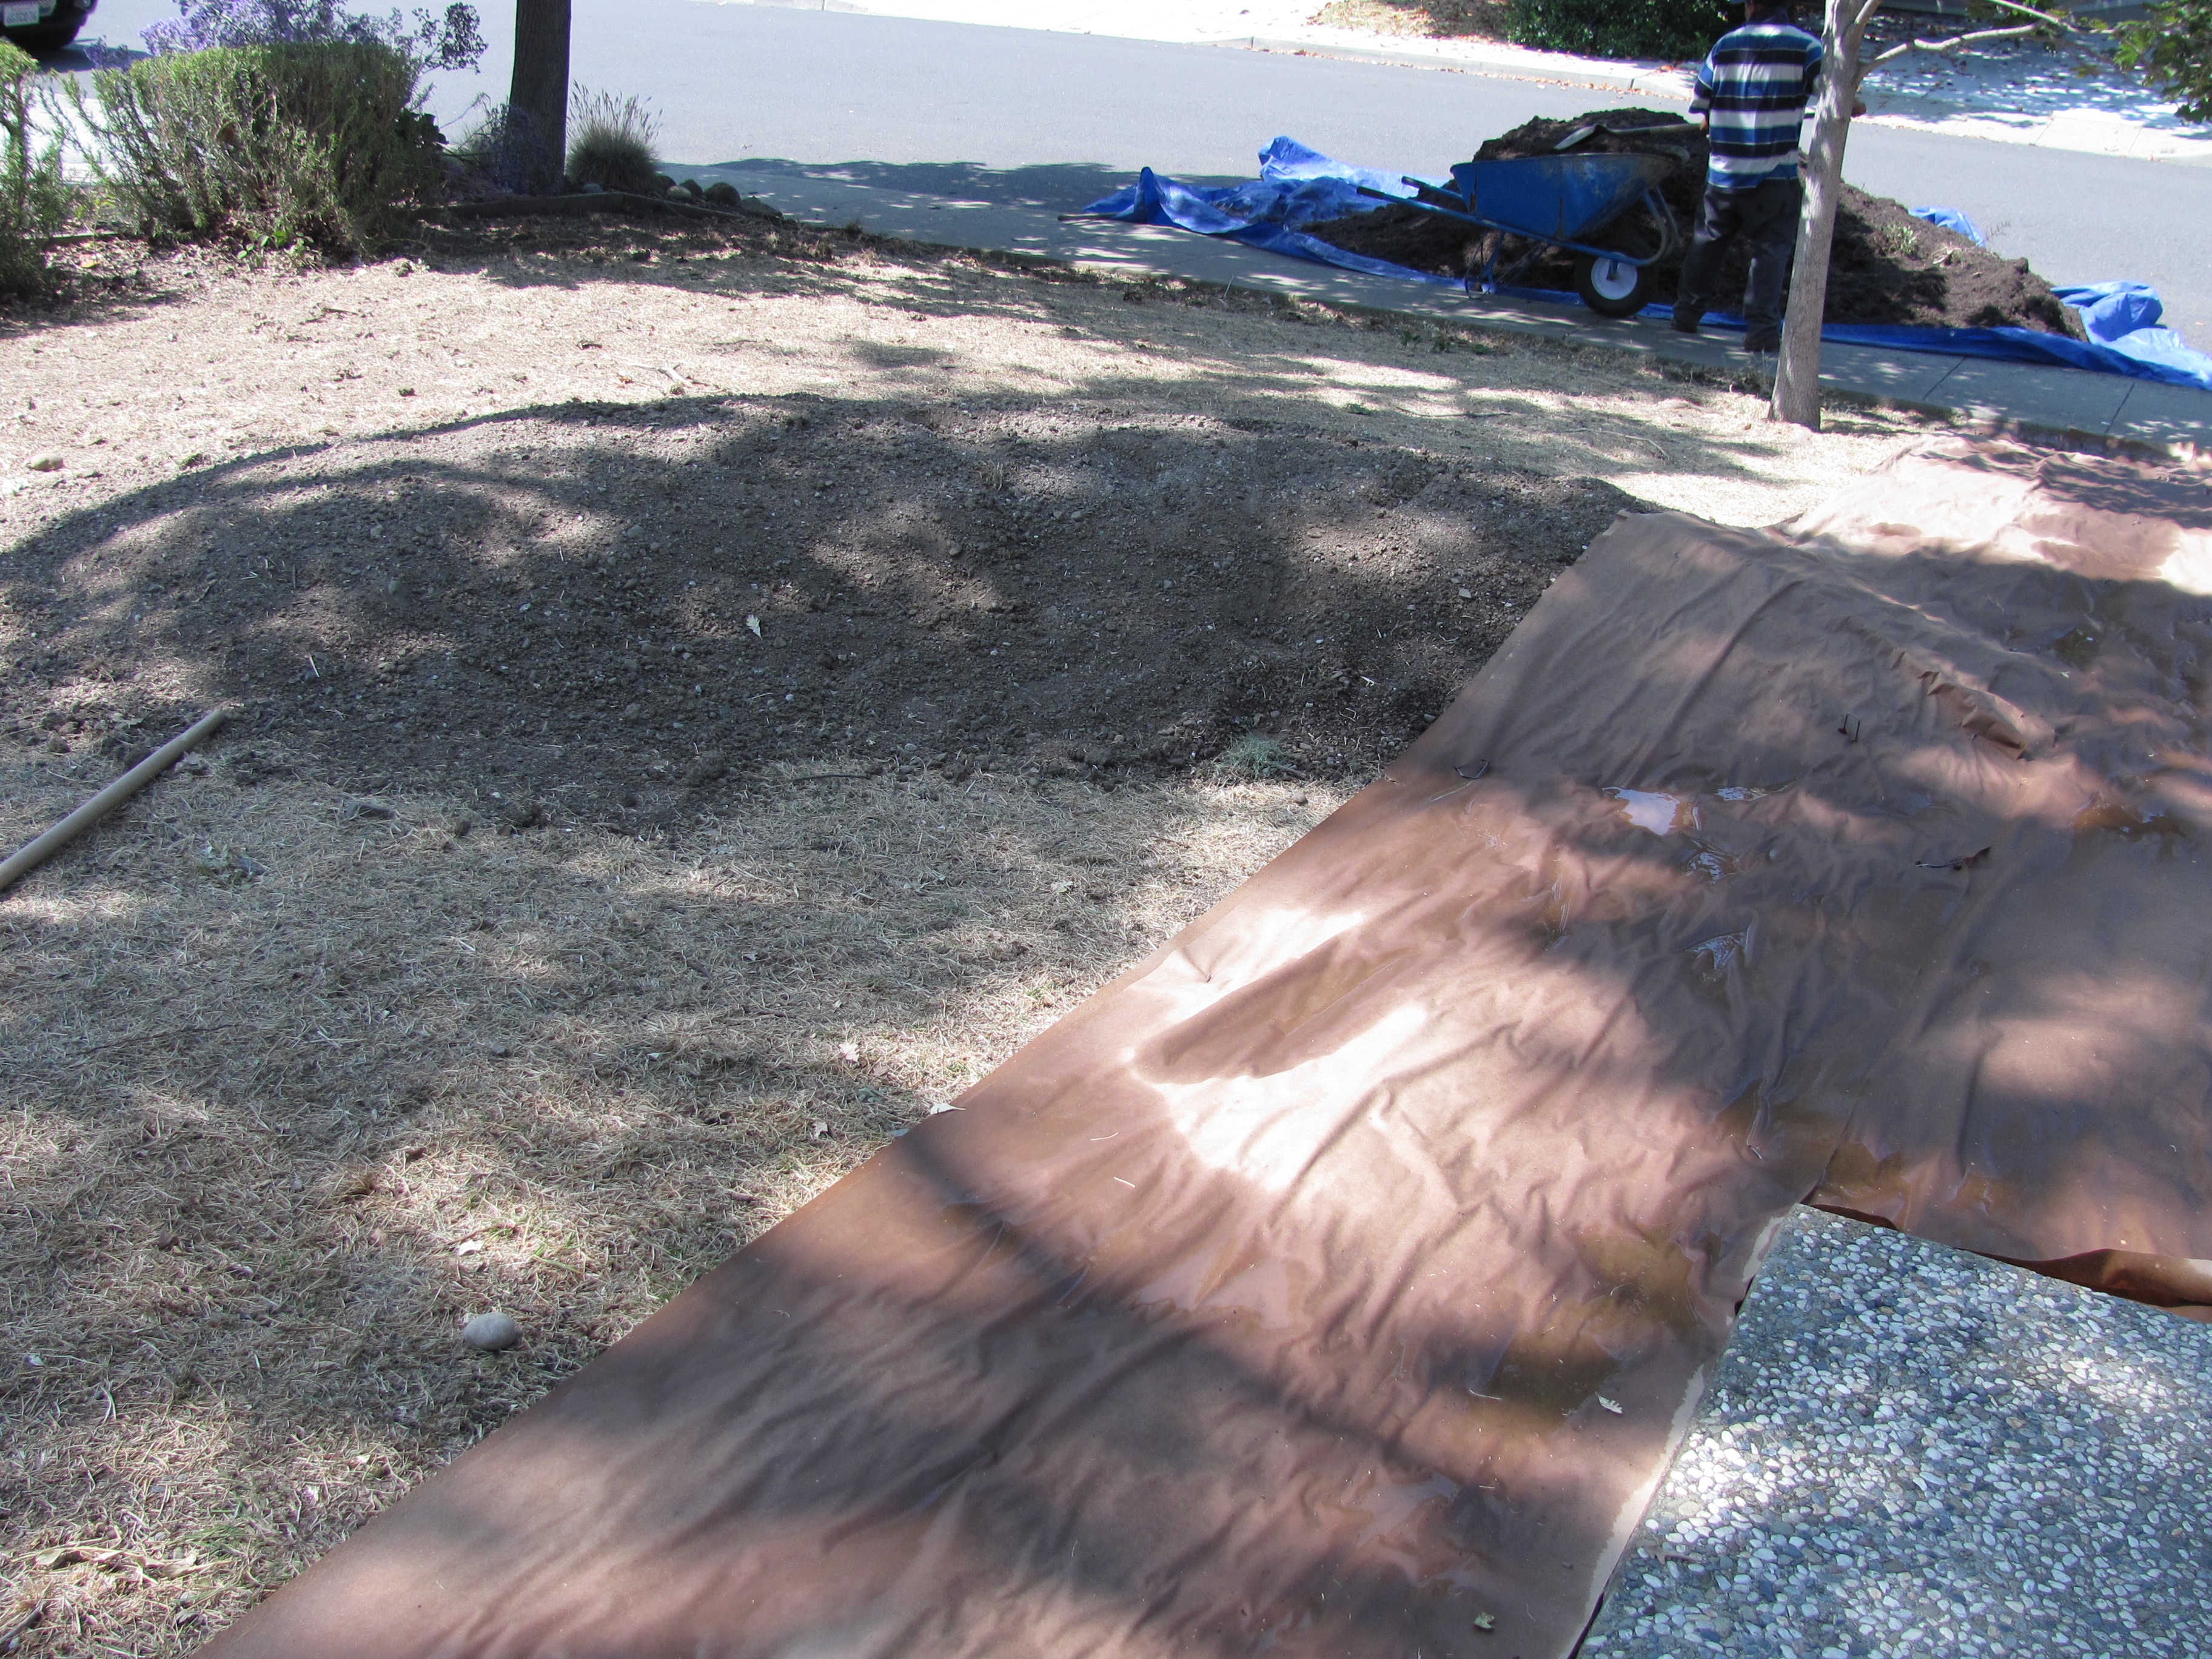
We begin the installation with a process called sheet mulching. This process will keep the grass and other weeds from receiving any sunlight, preventing them from growing back. Mulch also reduces the amount of water that is needed, protects the soil from heat and evaporation, and eventually breaks down and adds nutrients to the soil. In the end, it help to build soil health so that it is looser, it feeds your plants, and it absorbs and holds onto more water, reducing storm water run-off.
We begin by removing unwanted plants and hardscape and mowing down weeds. If there is Bermuda grass, we scalp it with a weed wacker, pick, or tiller.
Next, we dig a trench around the hardscape edges of the yard to make sure that the mulch doesn’t spill onto sidewalks and driveways. The trench is usually 6-8″ deep and wide, but can vary depending on the slope of the yard. The extra soil from the trench is spread throughout the middle area or used to create a natural looking mound.
Covering a yard in paper. Around the edges is a trench to catch the mulch, and in the center is a mound.
Our next step is to completely cover the ground with newspapers, builder’s paper, or cardboard and a thick layer of arbor mulch.
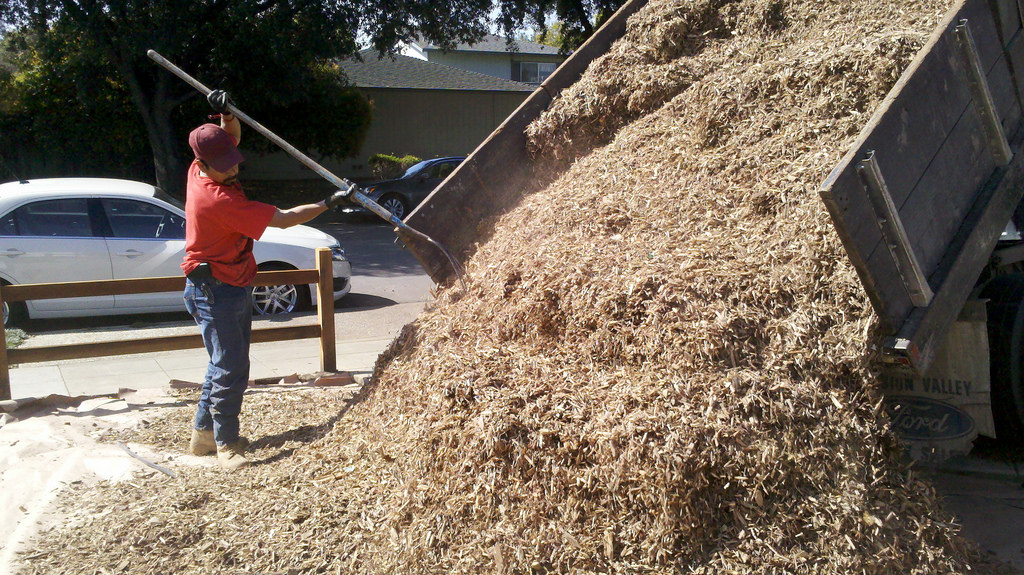
Arbor mulch delivered in a truck
Typically the first layer will be “arbor mulch” obtained from an arborist. It is later covered by a 1″ layer of decorative bark.
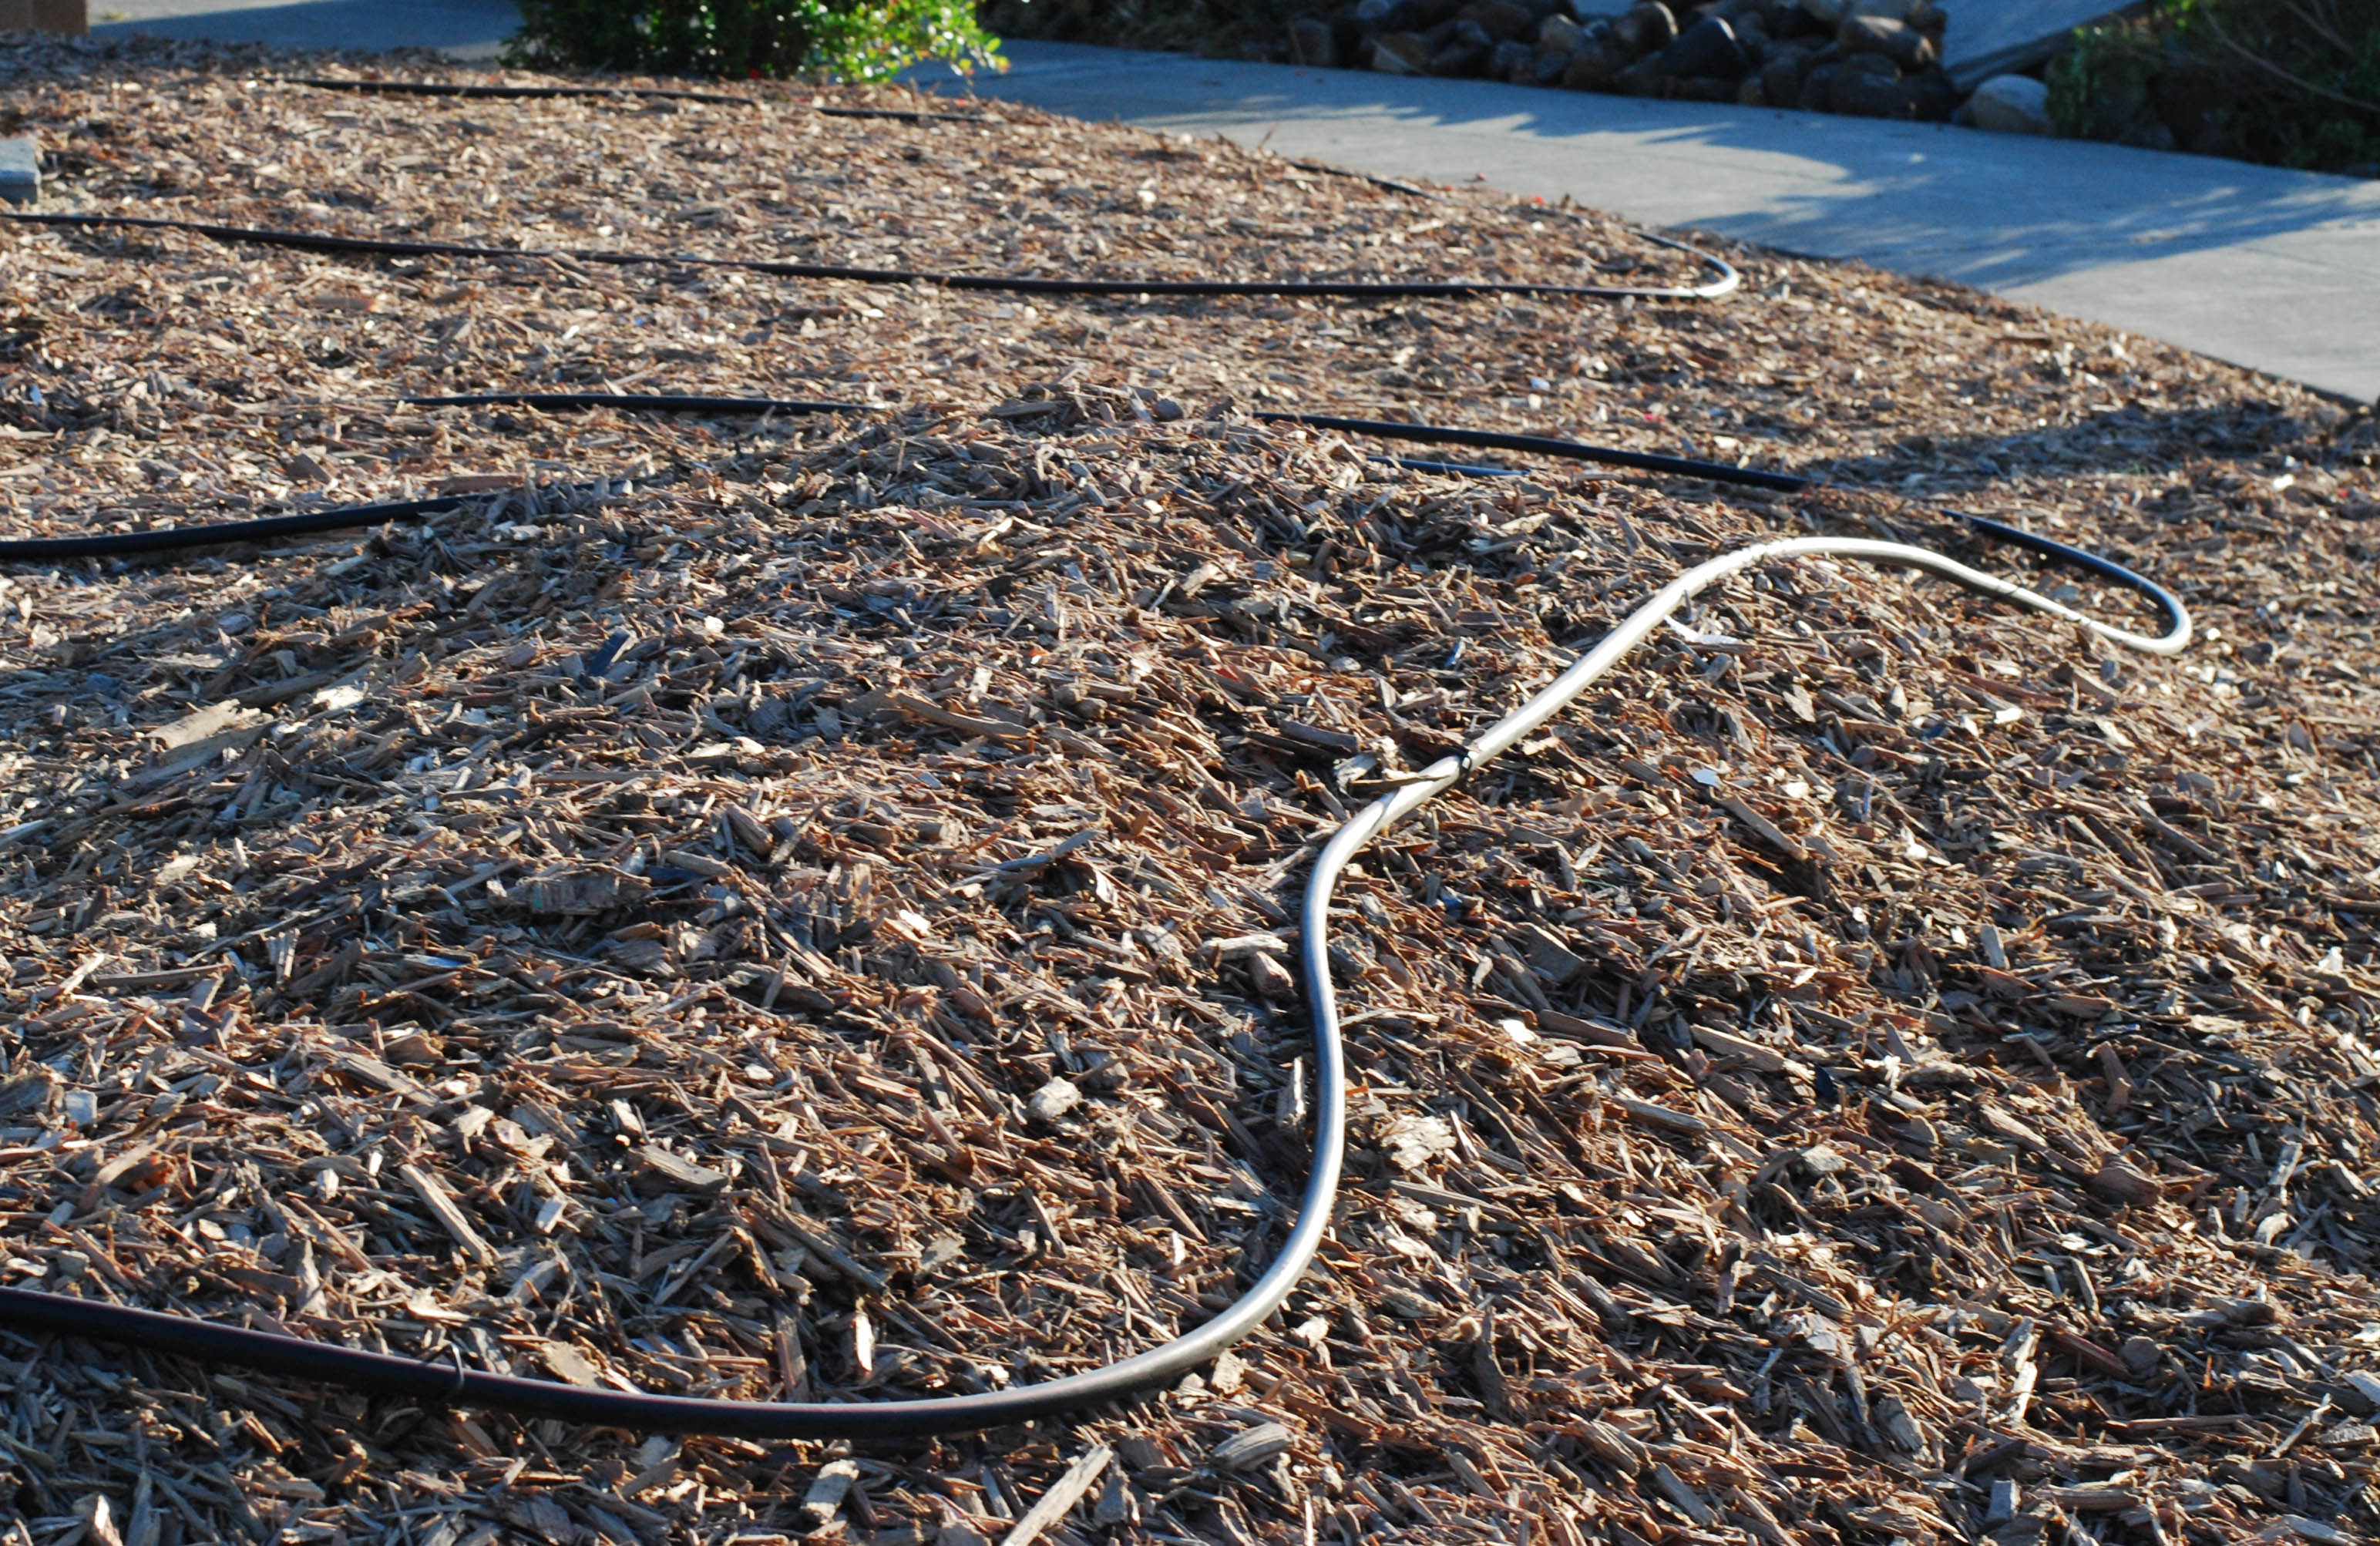
This is the mulch (with some irrigation tubing) on top of the former lawn.
Now the area is ready for planting, which will be the focus of the next blog post. Stay tuned!